This semester has been a learning experience especially in FDOM. One of the class assignments to do throughout the semester was to create and keep up with a blog website. This assignment has taught me that maintaining a blog is a bit challenging than what it looks like. After analyzing all of my blogs, I know there is always room for improvement. In the end, I had fun making these posts and eating my delicious recipes after every post.
I wish I added more details and showed my creativity a bit more with these posts. Another thing I could have done is add more of my personality into the posts. I was reading some of them again, and I could have engaged more with my audience. Although I was promoting all these posts on Twitter, to get a bigger audience I should have posted on other social media apps such as Instagram and Twitter. My best experience due to this blog was hearing back from friends and family who read these posts and told me how proud and creative I am. It felt good knowing people were actually reading my content and doing the recipes I would post. Overall this blog can benefit me in the future. If I ever need to create a website or another blog, I would have knowledge on how to do so.
My Site Statistics
My most popular week was on February 17 with the total of 84 views and 51 visitors. It was the first week I started this blog, so maybe people were curious on what I was going to post about. My popular post this semester was the All About Mepost with 73 views. I believe it was my most viewed post because it was my first time doing something like this, and my audience wanted to know what my blog was going to contain and get to know a little bit more about me. The most surprising fact about my site stats is that in the month of February, 104 people viewed my posts. I was shocked to see that many people viewing what I was posting about.
Site stat of the week of February 17.The number of viewers of each post. The number of people viewing my posts.
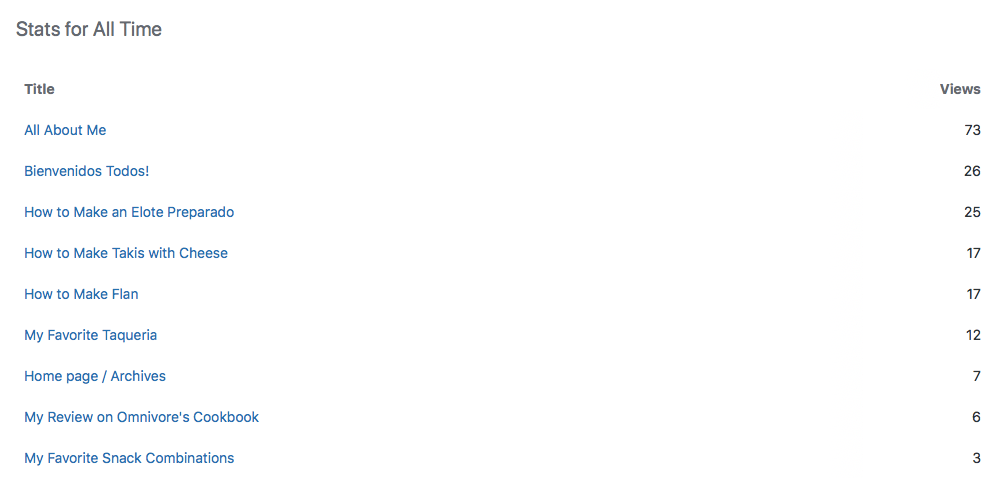
My friends and family know me as someone who always has something interesting to snack on. Some of my snack choices may seem questionable, but I promise they are packed with flavor. All these snack creations take no more than five minutes to make. It is quick and simple, what more can you ask for!
I consider these items must haves in my kitchen. I can never eat a basic bag of chips just to snack on. Ever since I was a little girl, I always loved to add some other ingredient to make the snack more enjoyable. With these products above I will show how to create two of my favorite must have snacks.
Snack Combination 1
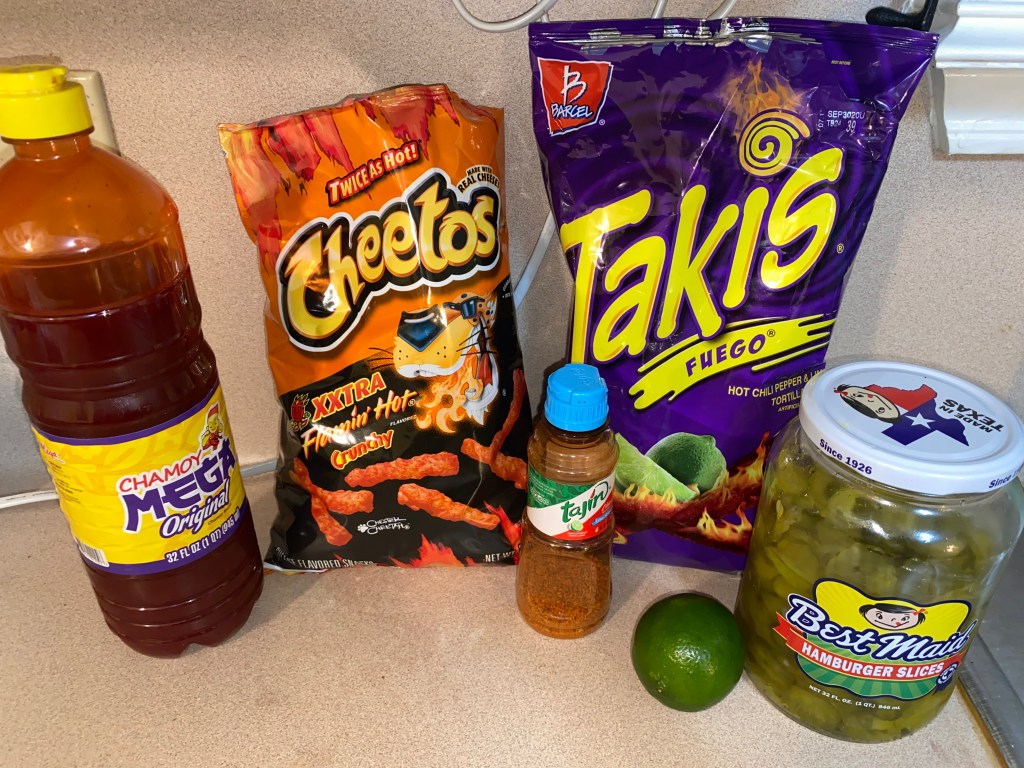
For this snack all you need is:
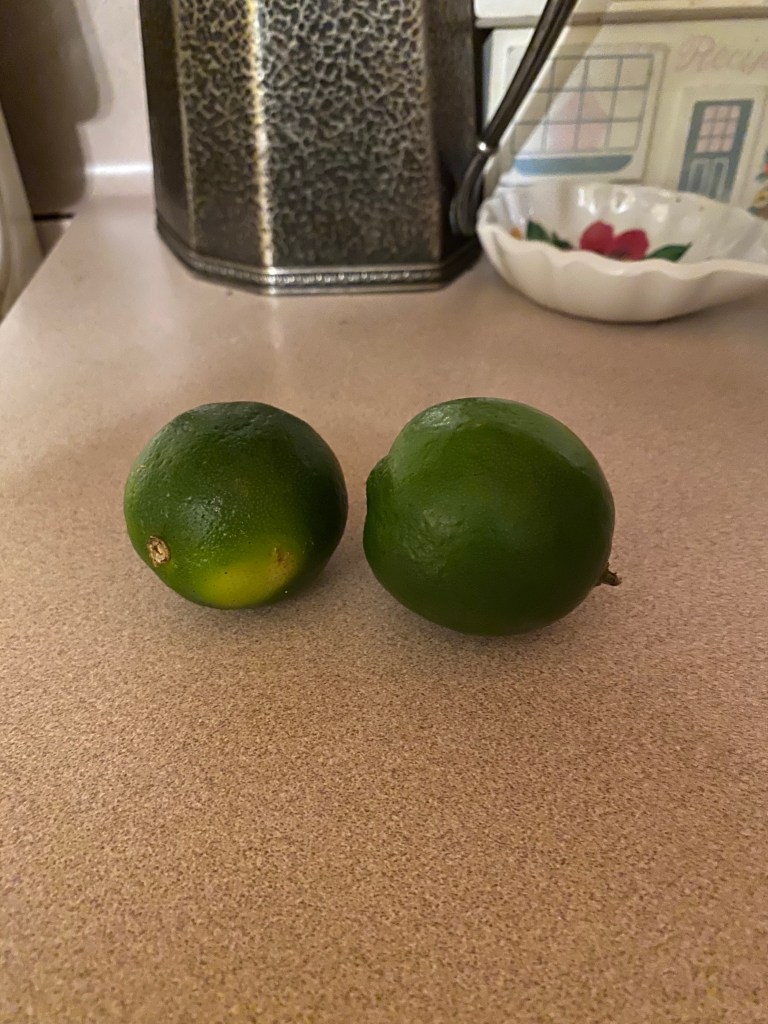
Extra Hot Cheetos
Lime
Chamoy
Tajin
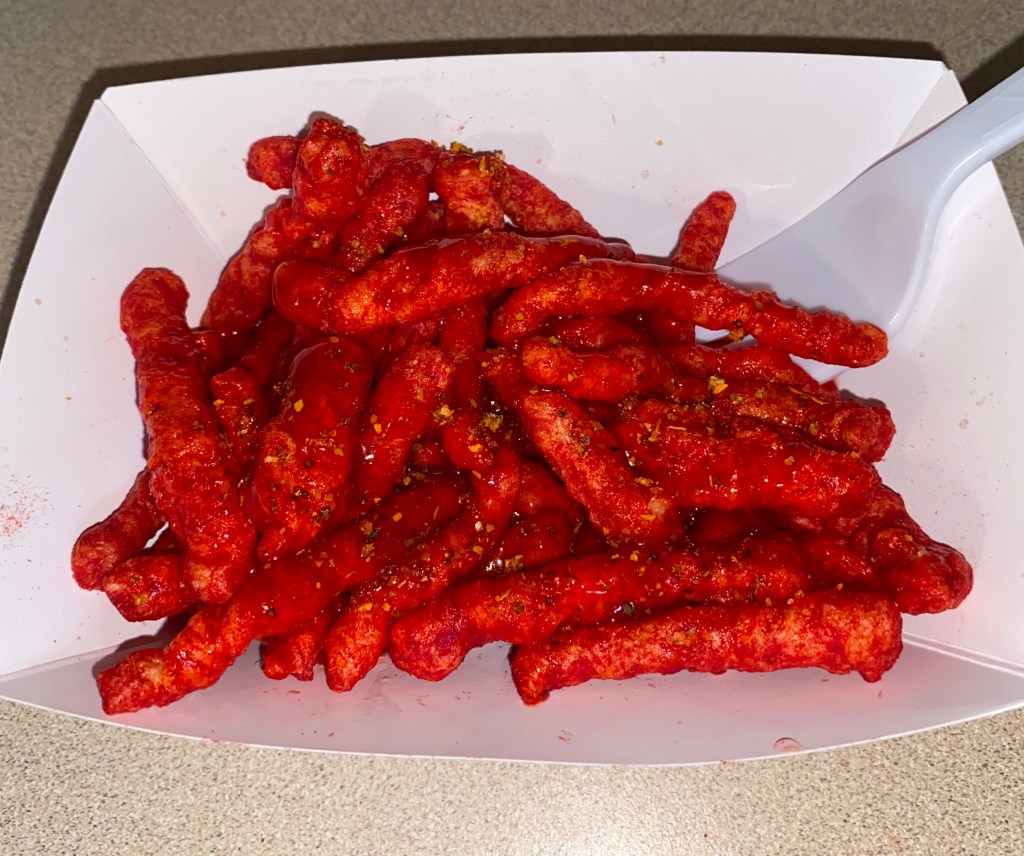
Directions
Pour the chips into a bowl.
Cut a lime in half and squeeze it all over the chips. I use a lemon squeezer, but your hands can also do the job just as well.
3. Pour the chamoy all over the chips, and top it off with some Tajin.
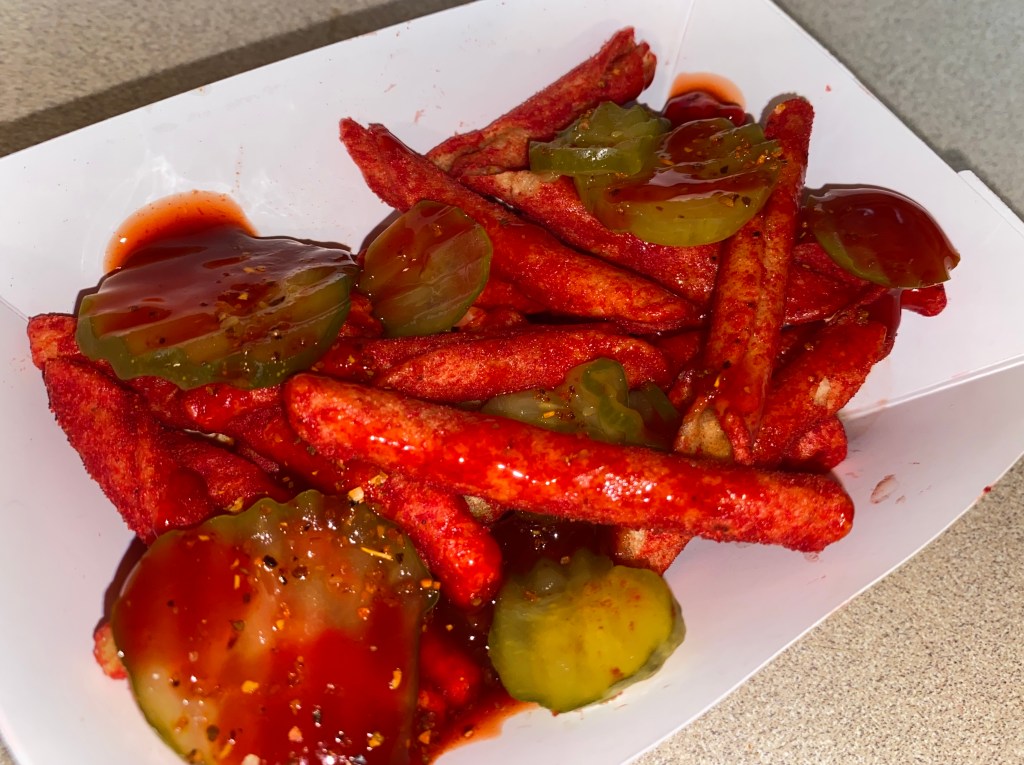
Get some pickles and lay them over the chips. I love to put some of the pickle juice as well.
Then, add chamoy and sprinkle Tajin all over the chips and pickles.
Mix it all up and enjoy!
Snack Combination 3
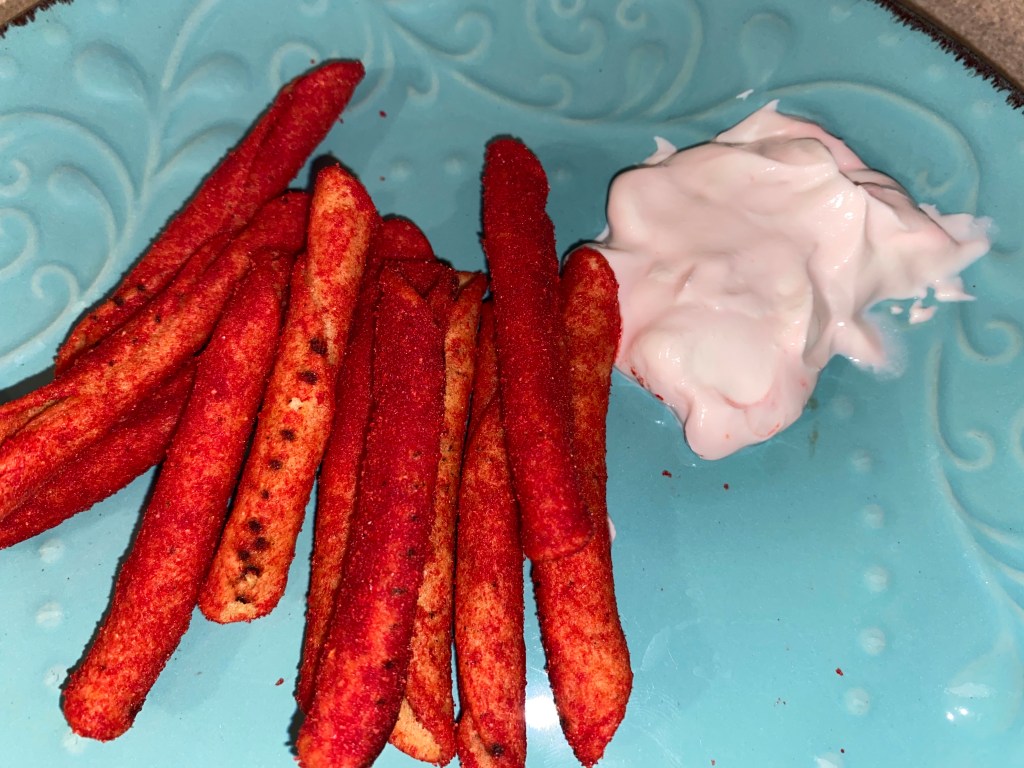
When I first thought of Takis and sour cream, I would have never imagined them being good together. One day a close friend of mine was eating it, and I was so confused on what was going on. She offered me some, and the moment I took a bite into it, my perspective of snacks changed. The creaminess of the sour cream and spiciness of the Takis balance each other out. All you have to do is pour some Takis on a plate or bowl. Then, get a spoonful of sour cream to dip them in and enjoy. Do not judge until you try it!
Snack Combination 4
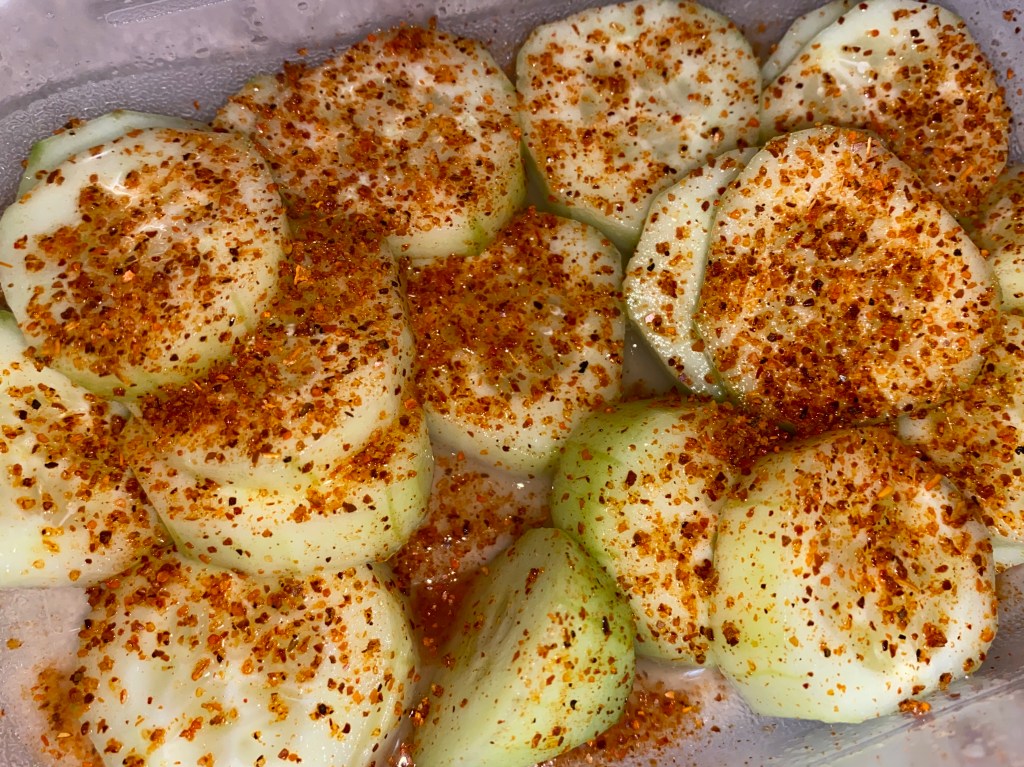
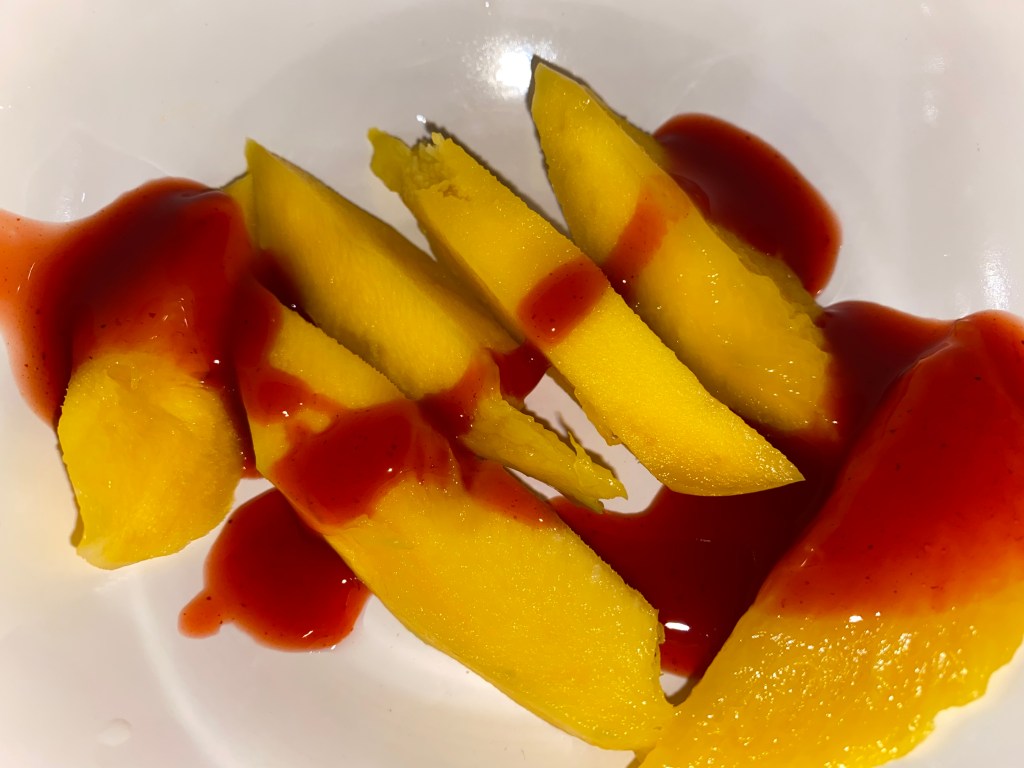
A person can never go wrong with a sweet and spicy creation. Sometimes I like to take a break with the chips. I love to cut up some cucumbers or any fruit, and add some Tajin and lime onto them. I tend to eat this when I feel like not eating something so crazy. My mouth always feels refreshed after eating snacks like these.
Sliced cucumbers with limon and Tajin. Mango with chamoy.
I do not have a sweet tooth very often, but there is this one dessert that I can never say no to which is called flan. Flan is a creamy custard Mexican dessert that was served on special occasions in my family. Whenever I saw this in my fridge ready to be served for dinner, I knew it was going to be a good day! A close family friend taught me how to make this yummy treat, and I was thrilled to share this. It may seem like a challenge, but it is all worth it at the end.
Ingredients
2 cups of sugar
1 can of Sweetened Condensed Milk
1 can of Evaporated Milk
2 cups of Heavy Whipping Cream
2 tablespoons of Vanilla Extract
5 eggs
Dishes Needed
Large Skillet pan
Measuring cups
Blender
Silicon or wood Spatula
Bundt cake tray
Large Bowl
Strainer
Large baking pan
Directions
Preheat oven to 350 degrees Fahrenheit.
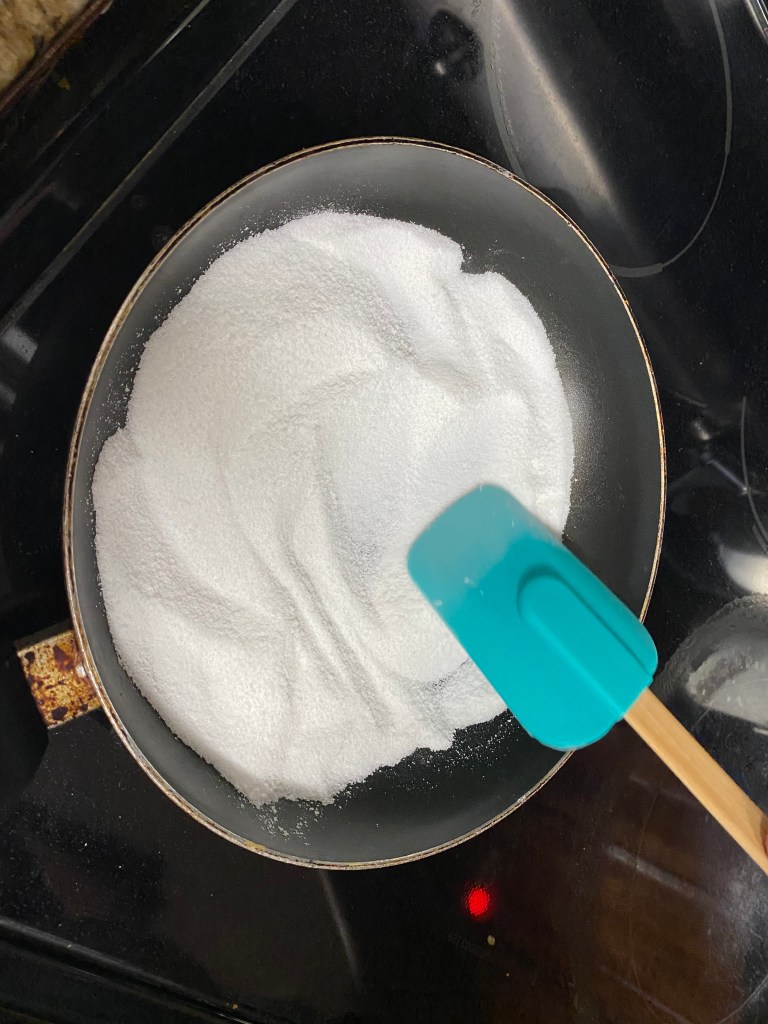
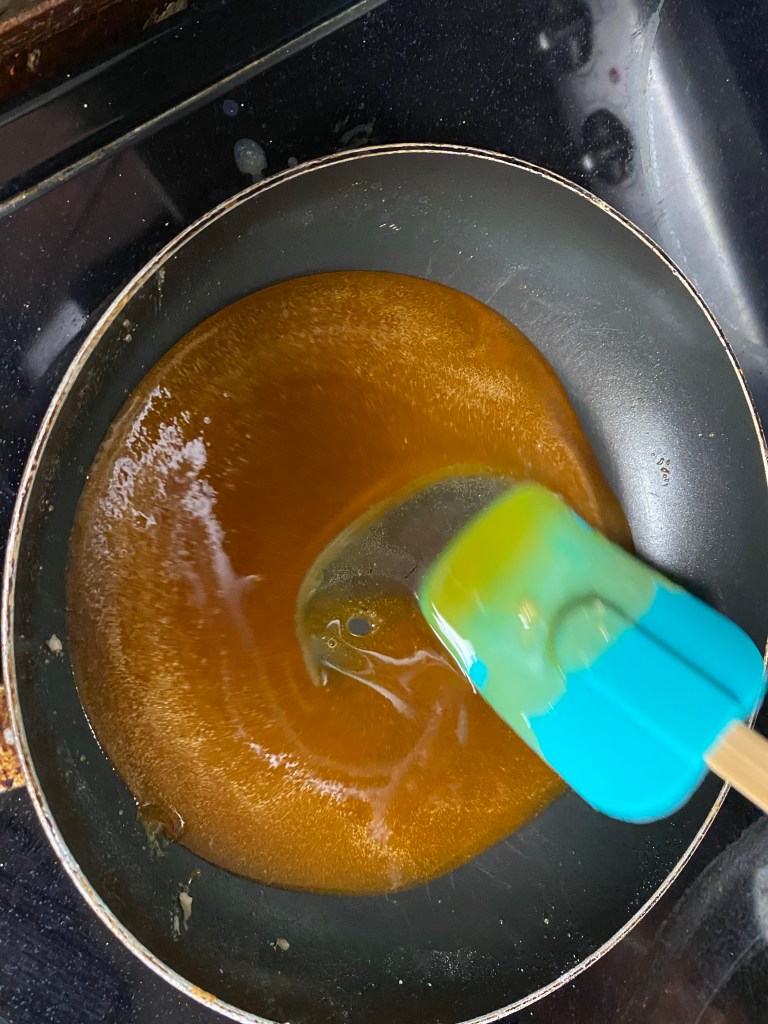
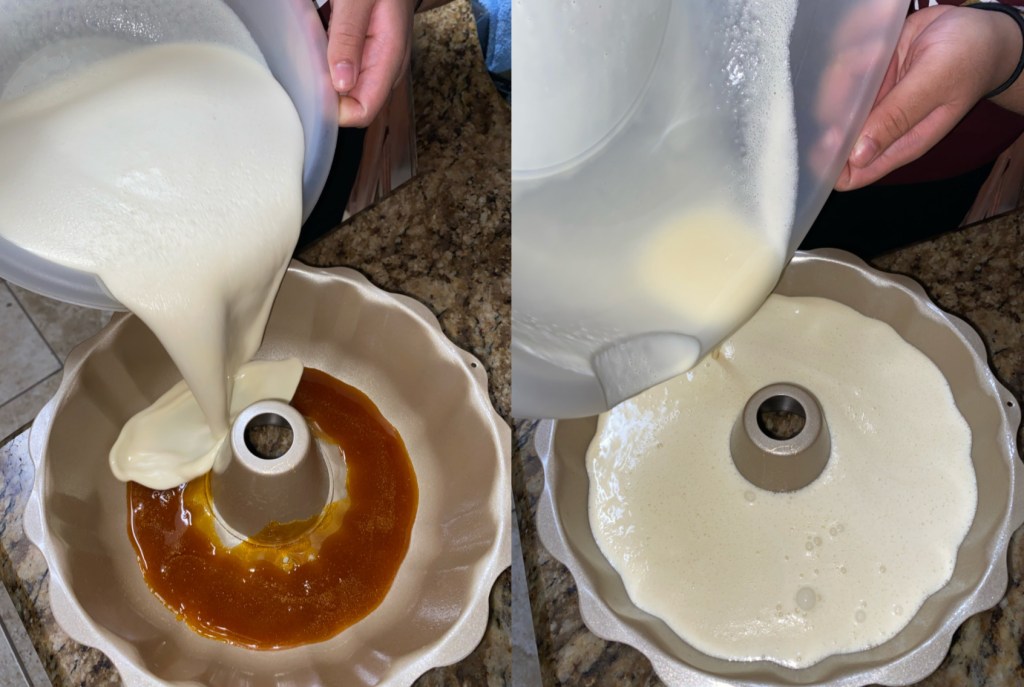
Set the large skillet pan on your stoves medium heat setting. Pour the two cups of sugar on the pan, and stir continuously with the silicon or wooden untensil. Try to avoid using a medal utensil because with all the stirring it can lead to burns on your hand. The sugar will turn into a brown and caramelized texture.
Before
After
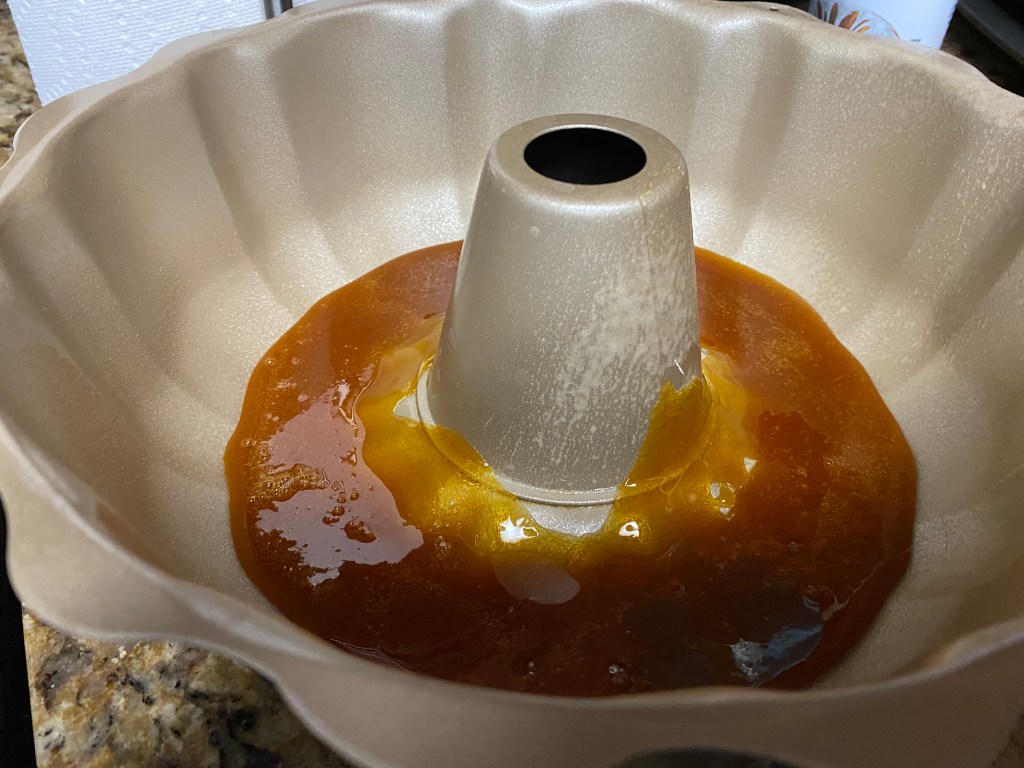
3. Spray some non stick cooking spray all over the pan and pour the melted sugar into the pan.
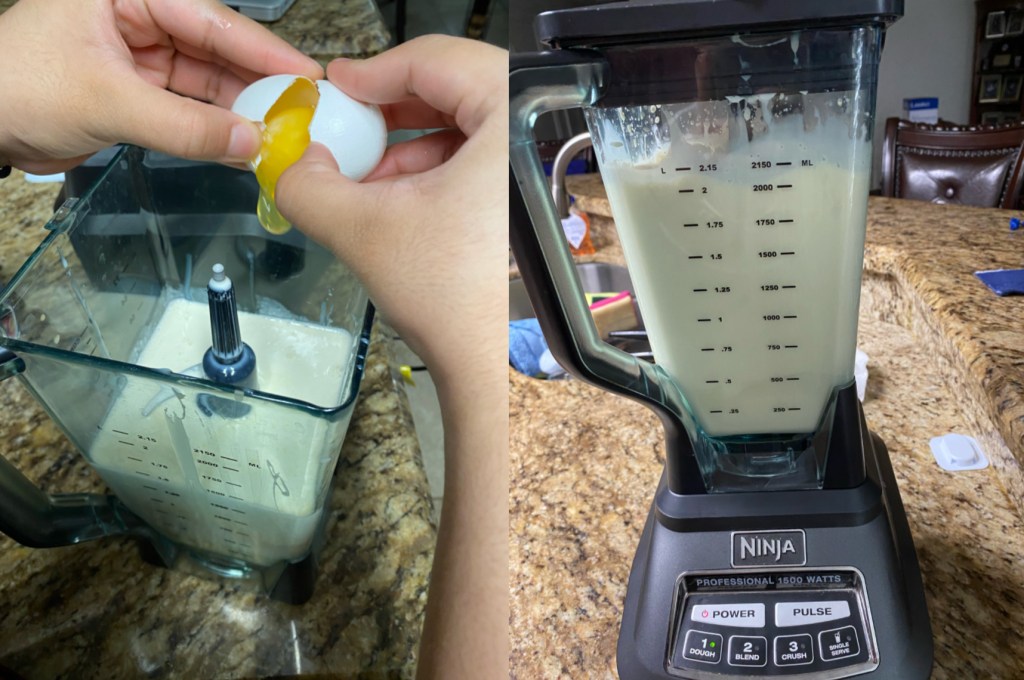
4. Set up your blender and pour the:
1 can of Condensed Milk
1 can of Evaporated Milk
2 cups of Heavy Whipping Cream
2 tablespoons of Vanilla Extract
5 eggs
I used a Ninja blender, so I blended the ingredients for 2 minutes on the lowest speed. Depending on your blender you may want to adjust the times or speeds.
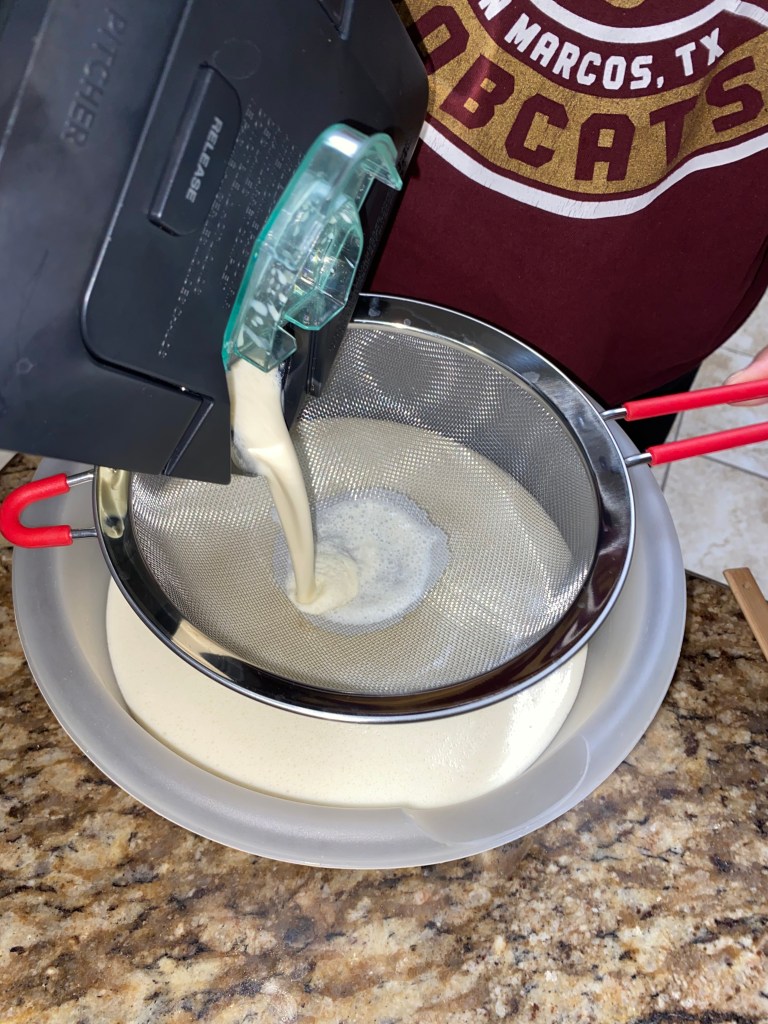
5. Pour the blended ingredients through the strainer into the large bowl. This method is used for avoiding any air bubbles forming and getting a smooth consistency.
6. Insert the blended ingredients into the bundt cake pan. It should be on top of the caramalized sugar. Then cover foil on the top of the pan.
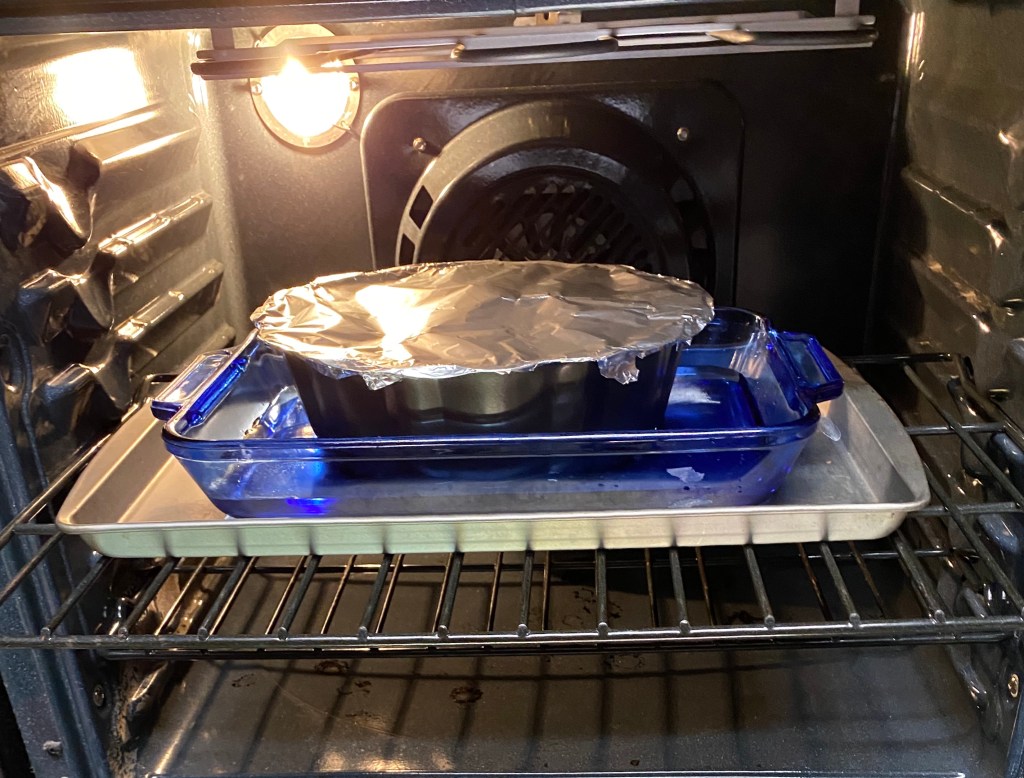
7. This next step is called “Baño Maria” which means water heat bath for the flan. Take the large baking pan and put your flan covered pan inside. Then, pour about two inches of water into the large baking pan. The flan should be on top of the water bath. This is important because this helps the flan bake in the oven to get a smooth surface.
The water is inside the blue baking pan. The flan pan is covered and on top of the water. To move the pan easily lay a cooking sheet under the baking pan to move the items.
8. Put the trays in the oven and let the flan cook for one hour and ten minutes. Times can vary depending on time of oven.
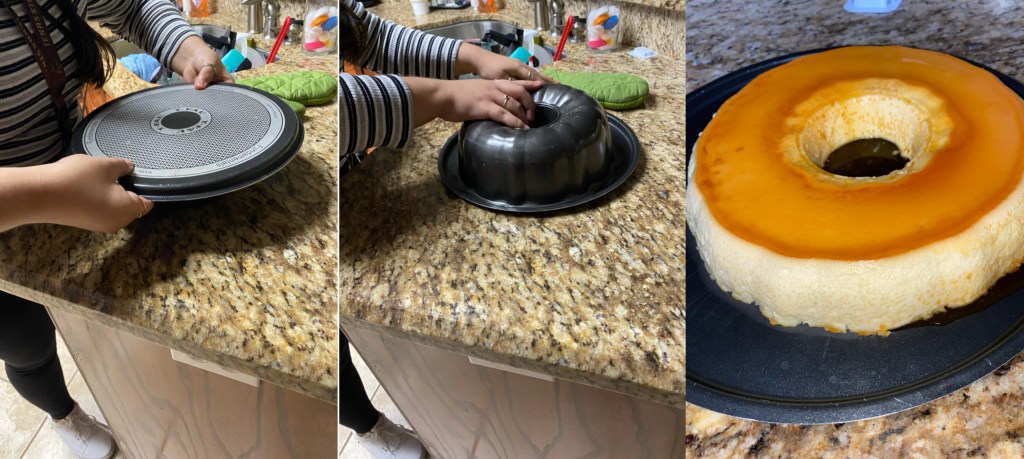
9. When the time is done, remove the flan pan from the water bath and let it cool. Once it is cool, get a circular cooking sheet and flip the flan over. The bundt cake pan should easily slide off of the flan.
This is an example how the flan should be removed. The last picture is the flan after being removed from the bundt pan.
10. Put the flan in the fridge for minimum of four hours. I personally prefer to leave it overnight because it gets more firm and does not fall apart easily. The texture is also more of a creamy consistency when it falls apart in the mouth.
11. Take the flan out and cut a piece of this delicious dessert. It feels like cloud of sweetness all in your mouth!
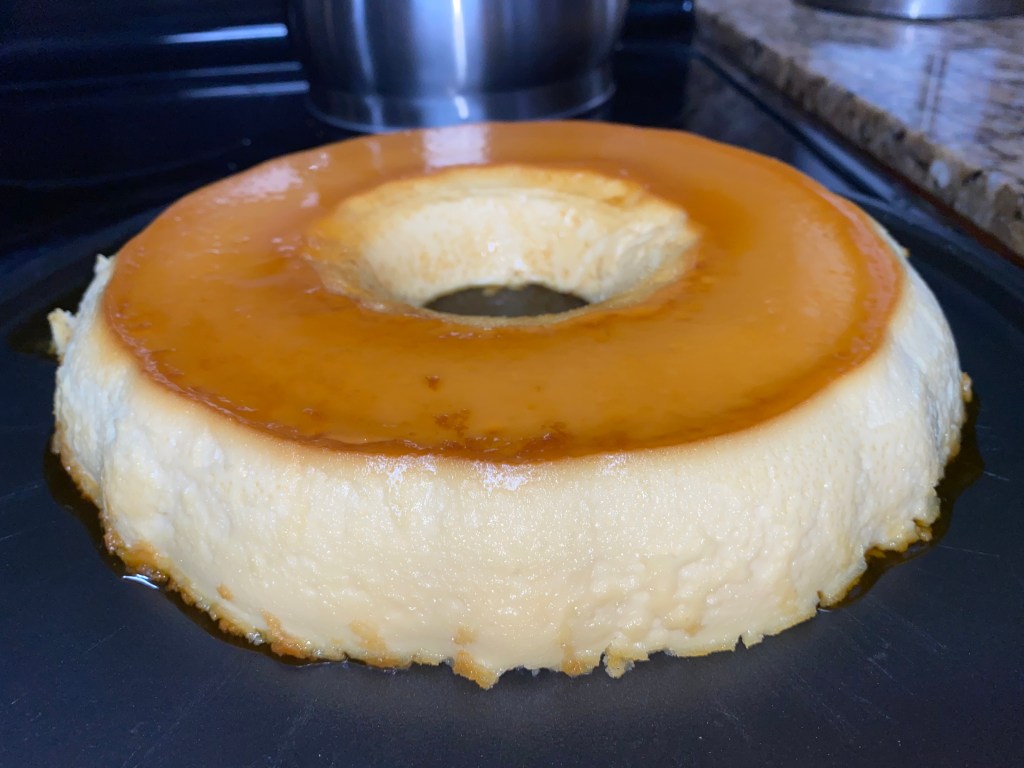
Finished Product
Tips While Making Flan
Make sure you prepare this with time. If you plan to make this for a gathering, cook it within a day in advance.
For the sweetened condensed milk, I love to use the brand Nestle La Lechera. The flavor is immaculate, and I could probably drink it straight out of the can. It reminds me of my childhood. If you do not know what brand to get, try this one!
While stirring the sugar make sure there are no balls of sugar being clumped together. It can be behind on the melting process, and potentially lead to burning the whole melted sugar pan.
Flan is a tedious dessert to make. Practice makes perfect, you will be a professional on making flan in no time.
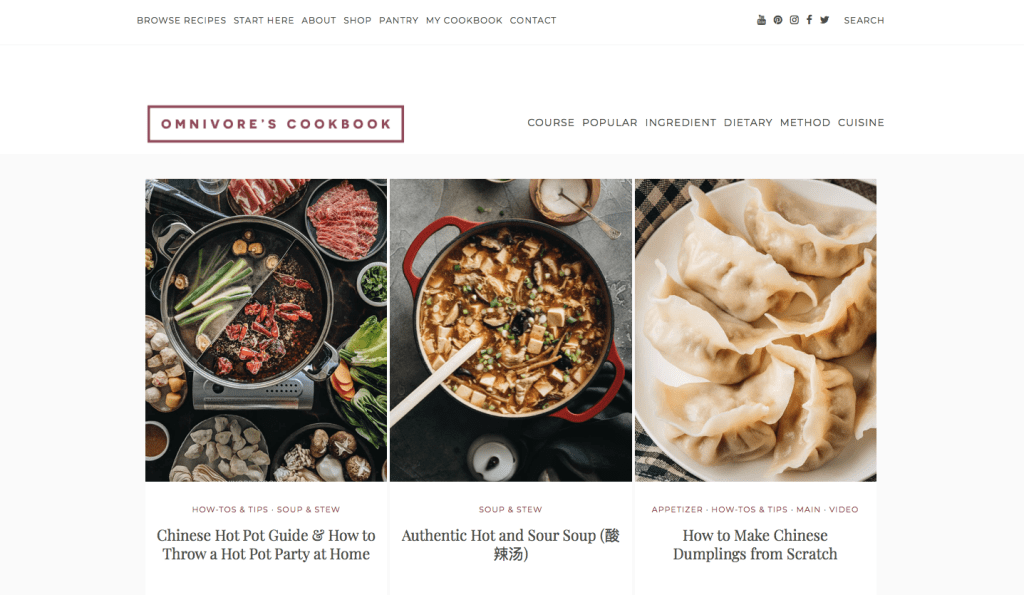
I have a lot of free time in my hands due to the order to social distance to contain the worldwide pandemic that is currently happening. One of my hobbies I enjoy doing during my free-time is trying new recipes and cooking them with my family. I was scrolling through WordPress one day and stumbled upon this food blogger. Her site was about how to cook some Asian appetizers, sides, and entrees. I have always been a fan of Asian food, so I got interested and started reading through her posts. This amazing blog is called Omnivore’s Cookbook.
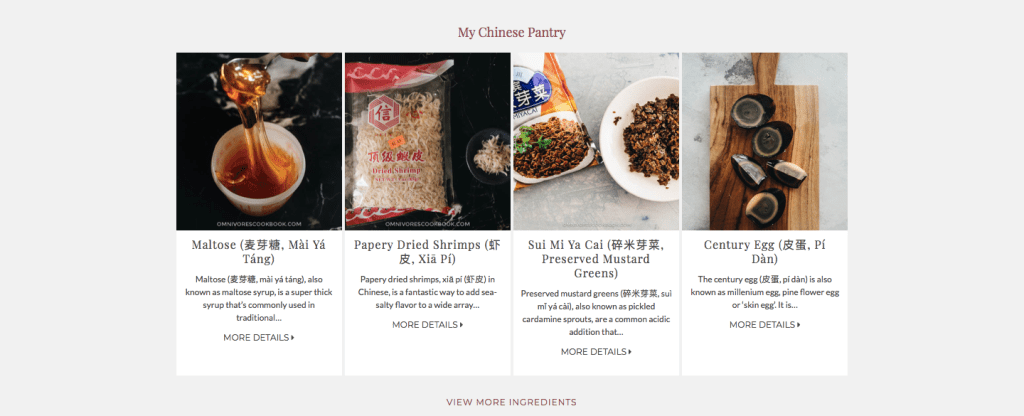
From the moment I clicked on her site, I enjoyed the layout of all her recipes and how it was simple to navigate through her site. The first recipe that caught my eye was how to make dumplings from scratch. She first gives a background of the food and an opinion on it. I love this because if I am cooking with ingredients I have never worked with before, I would like to have extra information on it and she does exactly that. Her instructions on how to prepare the dish are detailed and simple to follow. It does not make you question anything and she gives different directions if you decide to freeze them, boil, steam, etc. At the bottom of her homepage she includes a virtual Chinese pantry which holds all the essential ingredients she uses to cook most of her meals, and I thought this was a neat detail to include in her blog.
Omnivore’s Cookbook Chinese Pantry
Omnivore’s Cookbook comes with many options of cuisines such as vegan and vegetarian options, low-carb, and my favorite 30 minute or less recipes. I am glad I found this blog because I can finally make my favorite Asian dishes in the comfort of my home. Most importantly, I aspire to be an amazing blogger just like her.
Going away for college made me appreciate the authentic taste of Mexican food. As much as I love San Marcos, and the delicious food places I have tried. I missed eating tacos from my favorite taqueria back in my hometown. A taqueria is a restaurant where they specialize in tacos and other yummy latin dishes such as tostadas, quesadillas, sopes, tortas, etc… If one day you decide to take a trip to Mission, Texas here is a delicious taqueria you all should try!
La Curva Taqueria
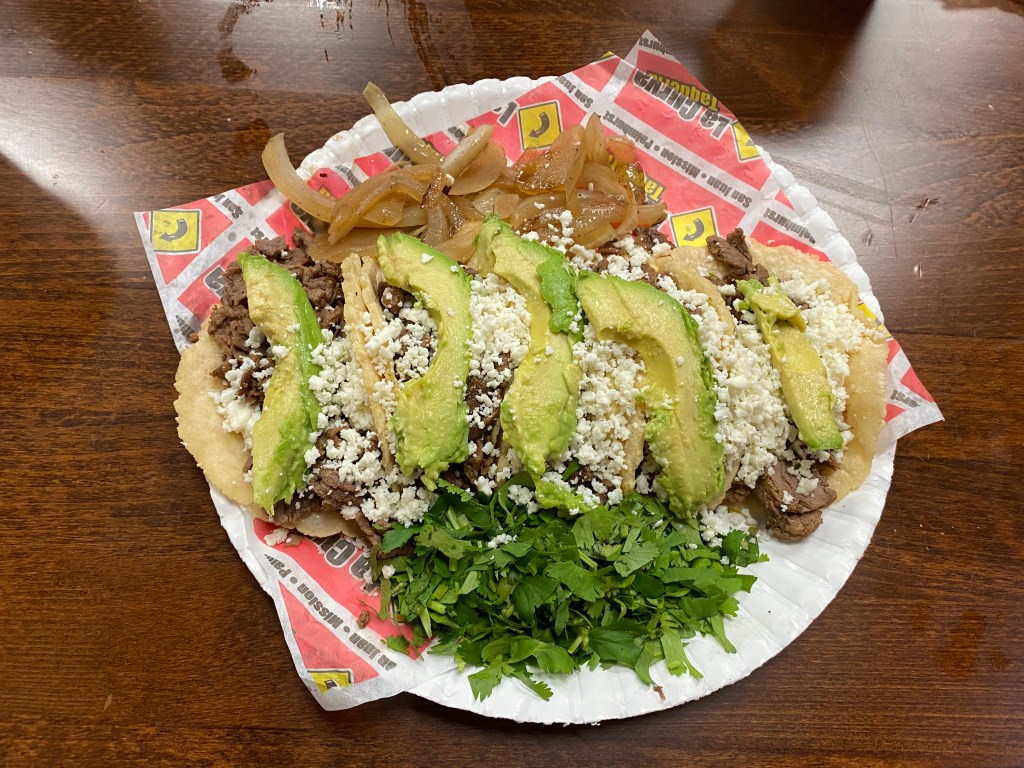
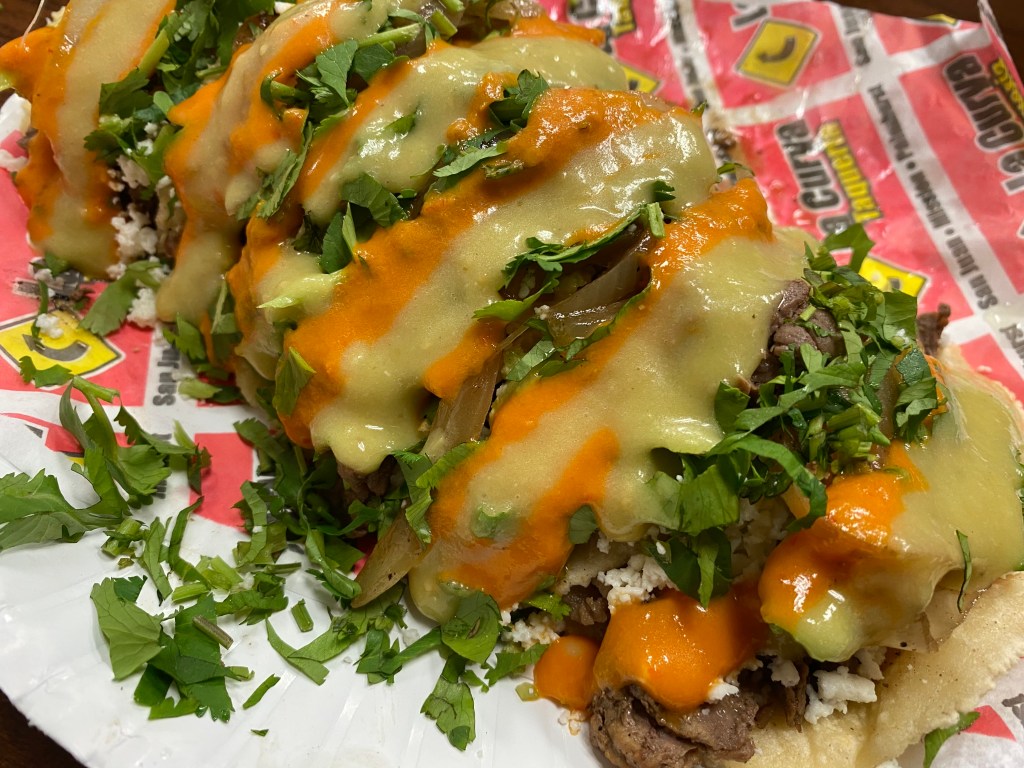
The tacos below are my favorite order from La Curva. This order is called Order R.B and it is only $7.50. The tacos comes with bistec, avocado, queso fresco, grilled onions, and cilantro. My tacos are usually loaded with everything I am given. I also grab some limes to squeeze onto my order of tacos. Lastly I use salsa verde and salsa roja to give my tacos some spice. I love my spicy salsa!
How Orden R.B originally look like.This is how my tacos look after I am done preparing them.
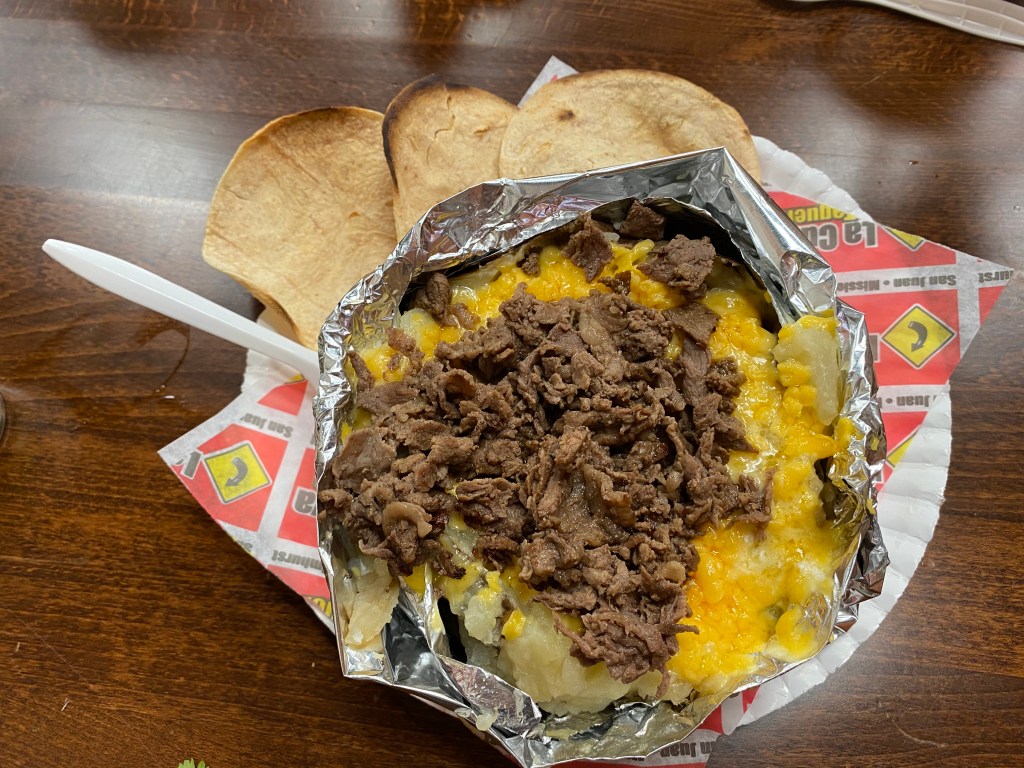
The next must have order on this menu are their Papa Asada Especial. The potato is very filling, and it is only $5.50. It is a baked potato with butter, cheese, sour cream, and bistec meat. My favorite part are the crunchy tostada tortillas it comes with on the side. What I like to do with my papa is get a spoonful and put it in my tacos. If you all have not done that yet, you are missing out! I also add some salsa because well I love my salsa.
The last food item I will mention from La Curva is a Sincronizada. A sincronziada is a flour tortilla with beans, bistec, and white cheese. You can also put cilantro, grilled onions, and avacado for only $7.50. This is my brother’s go to meal when we go to taquerias. So if you want to try something different other than tacos, this is an order for you!
Extra Information On La Curva Taqueria
La Curva has a variety of meat selections to choose from such as bistec (beef steak), fajita, tripas (beef tripes), chicken, trompo (pork meat marinated in spices) etc…
You can take your meals to go, so if you do not feel like eating in the restaurant just call in your order and pick it up to go!
Every order comes with a cup of beans for free.
There are three locations in the Rio Grande Valley:
2912 N Raul Longoria Rd, San Juan, TX 78589
2575 E Griffin Pkwy, Ste 12, Mission, TX
4415 N Conway Avenue Palmhurst, Texas 78573 *This is the one I go to.*
Lastly, GO OUT AND SUPPORT LOCAL BUSINESSES!! You will not be disappointed on their service and delicious food.
Corn may seem like a boring food or side to some people. While others have experimented with this food item and made it into a delicious snack. When I describe an elote preparado (aka prepared corn) to others their reactions are usually confused and disgusted, but once they try it they are immediately in love with this snack. There are many interpretations of this snack, so here is my mouth watering recipe of an elote preparado.
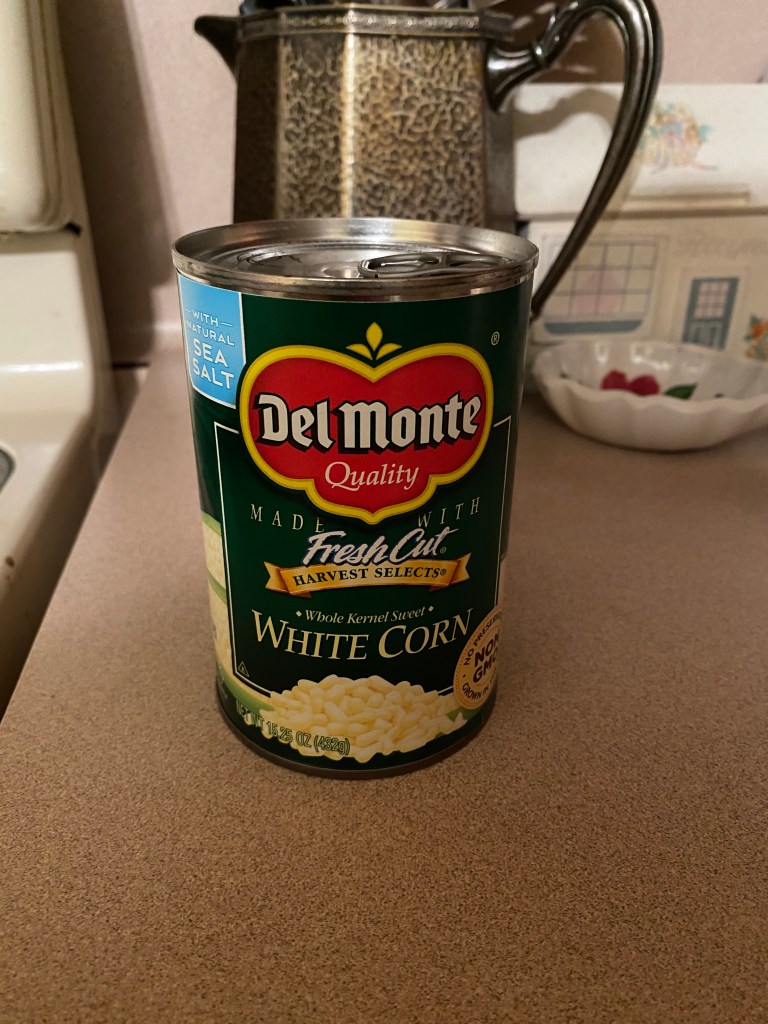
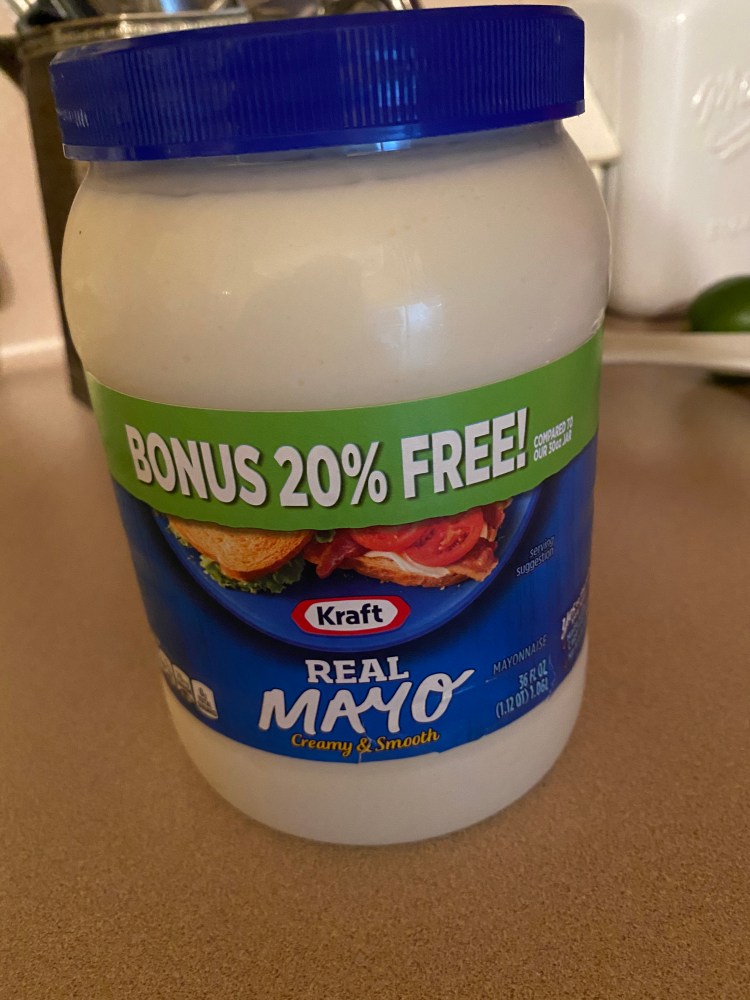
Ingredients
1 can of White Corn
Mayonnaise
2 -3 limes
1 packet of Chile Naranja
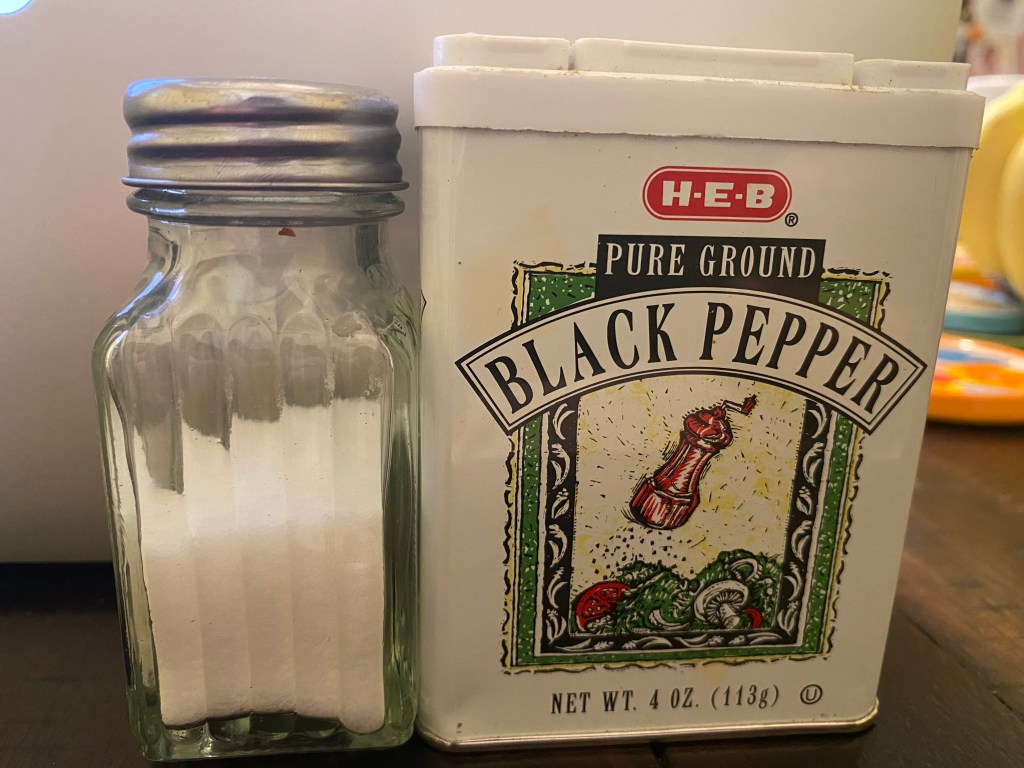
Salt and Pepper
Directions
Open the can of corn and pour it into a pot. Place the pot on the stove on medium heat and continuously stir the corn until hot.
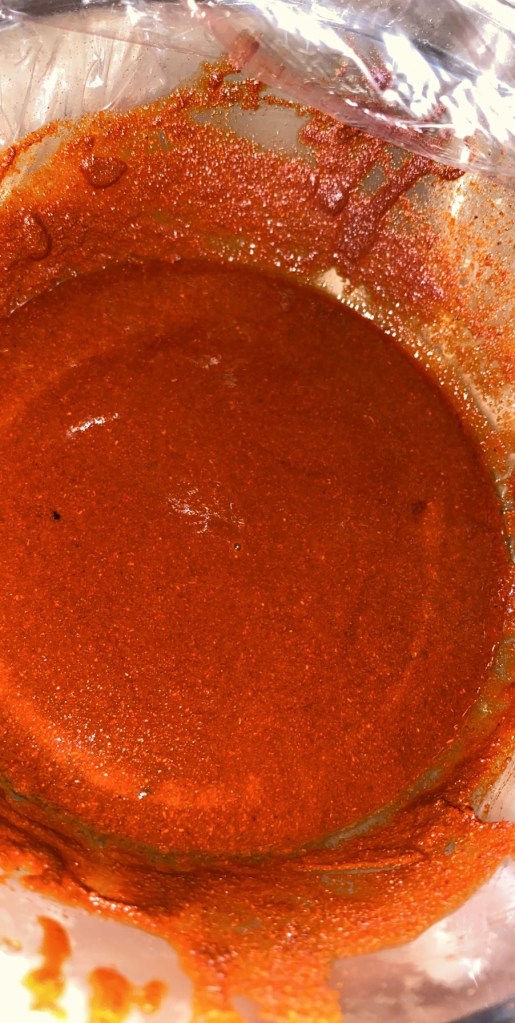
While the corn is heating up, start preparing the Chile Naranja to a creamy consistency.
Open the Chile Naranja into a bowl, cut the limes, and squeeze it into the bowl with the Chile. Add about 2 tablespoons of water as well so it can start being creamy.
Stir the Chile and add salt and pepper to your liking. If you want more lime you can add more as well. I add two limes and it leaves the perfect citrusy flavor.
This should be the consistency when the Chile is ready.
How I Prepare My Elote
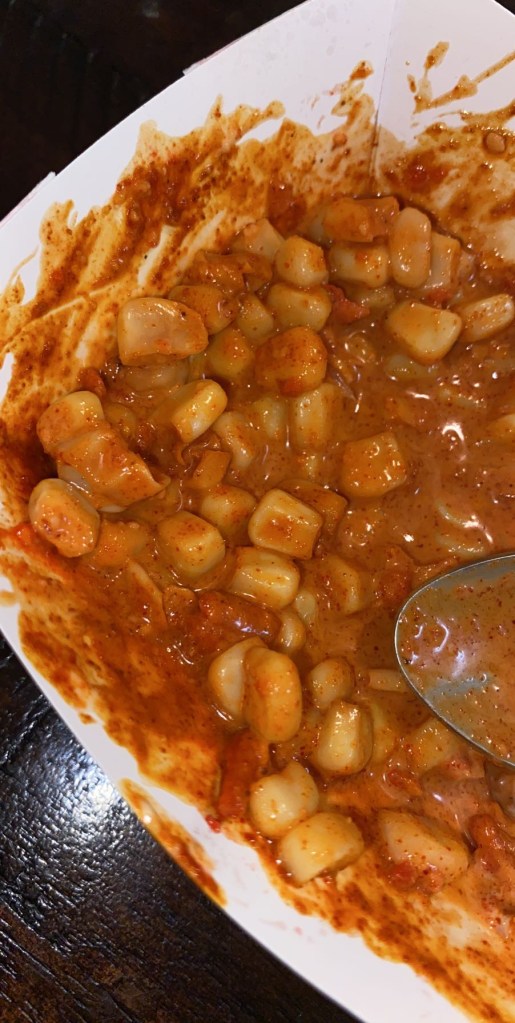
I pour my serving of corn into a bowl and squeeze some lime onto my corn.
Next I start adding some Chile Naranja. I love my corn to be spicy, so I add about 3-4 tablespoons.
Then I add about 1-2 tablespoons of mayonnaise. Mayonnaise is added to cool down the spice a bit, but never add too much to overpower the flavor.
Lastly I sprinkle some parmesan cheese onto my corn and mix it all together.
This is how my elote looks like when mixed together.
Fun Facts On Elote Preparados
To make this snack more fun crush some Hot Cheetos or Takis. It will add more spice and flavor to the elote.
The reason I use white corn instead of yellow corn is because white corn is not as sweet as yellow which can throw off the flavors of the snack. White corn absorbs all the ingredients being used, and it does not leave a sweet aftertaste.
At my hometown, there are many snack stands that make elote preparados. If you do not want to make these, go out and support a local snack stand around your area. They will never disappoint!!
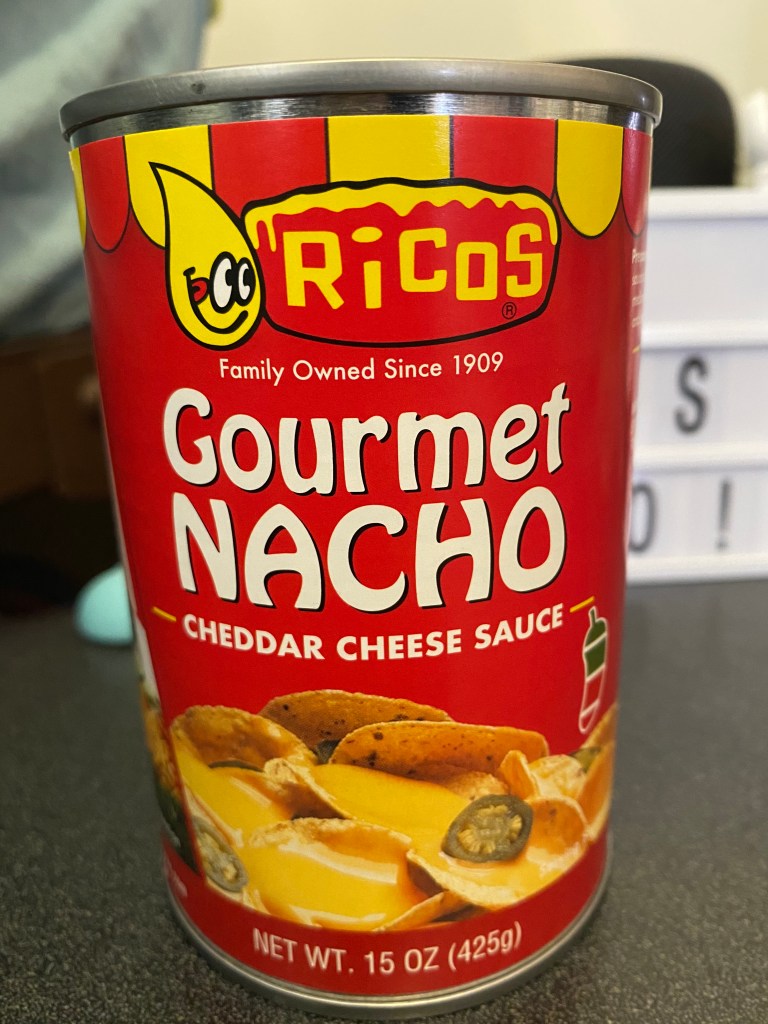
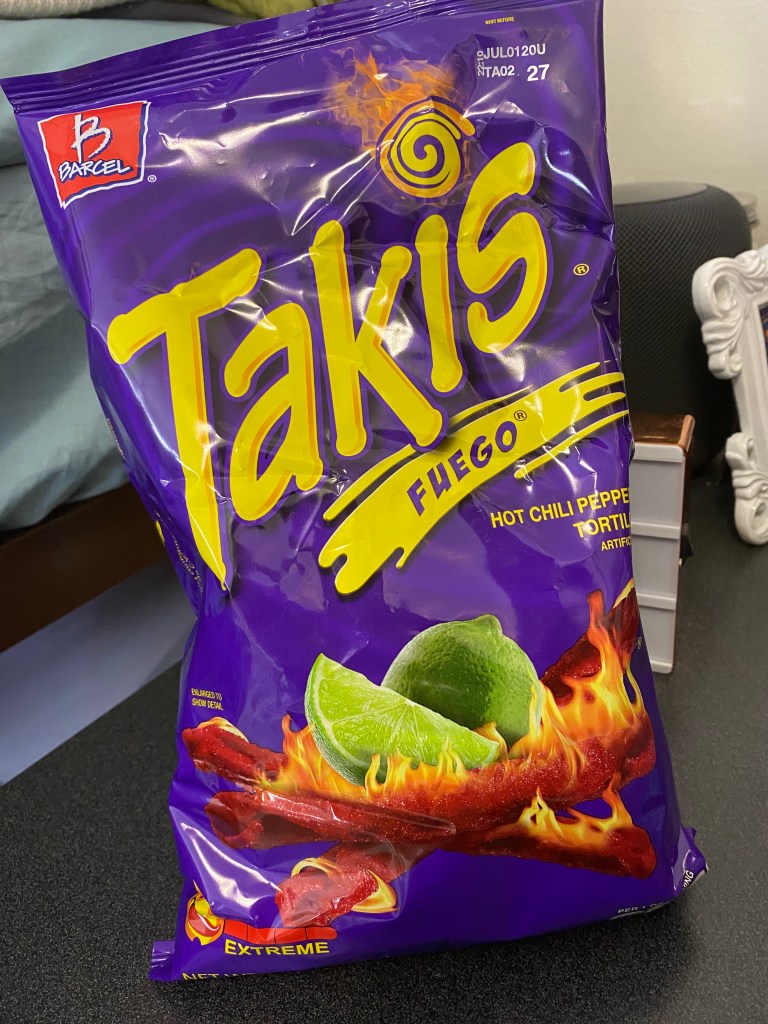
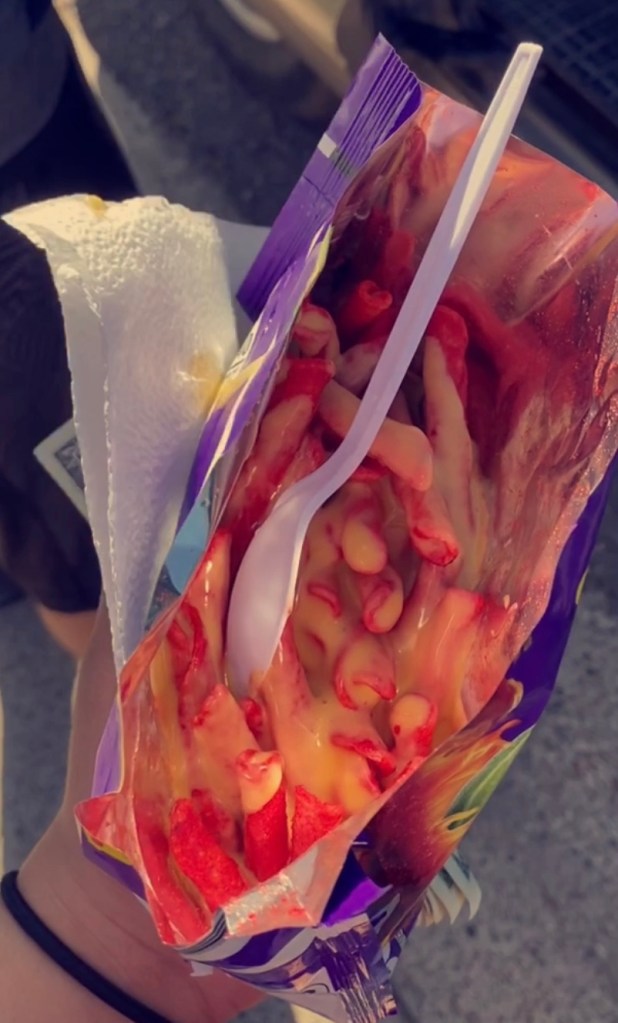
A basic snack an average person will think of is pretzels, crackers, or a plain bag of chips. There are so many snack combinations out there in the world, and this one might be one of the best ones you are missing out on. In the Latin community, the average chip that goes on cheese is Hot Cheetos. However, one day in elementary school while I was waiting for my mom, my school was selling a whole bunch of snacks with melted cheese. I saw a bag of Takis and I asked to have cheese in the bag. I got many stares from people, but the moment I had a taste, I knew I had to tell people about it. From then on, Takis and cheese is a snack I have enjoyed.
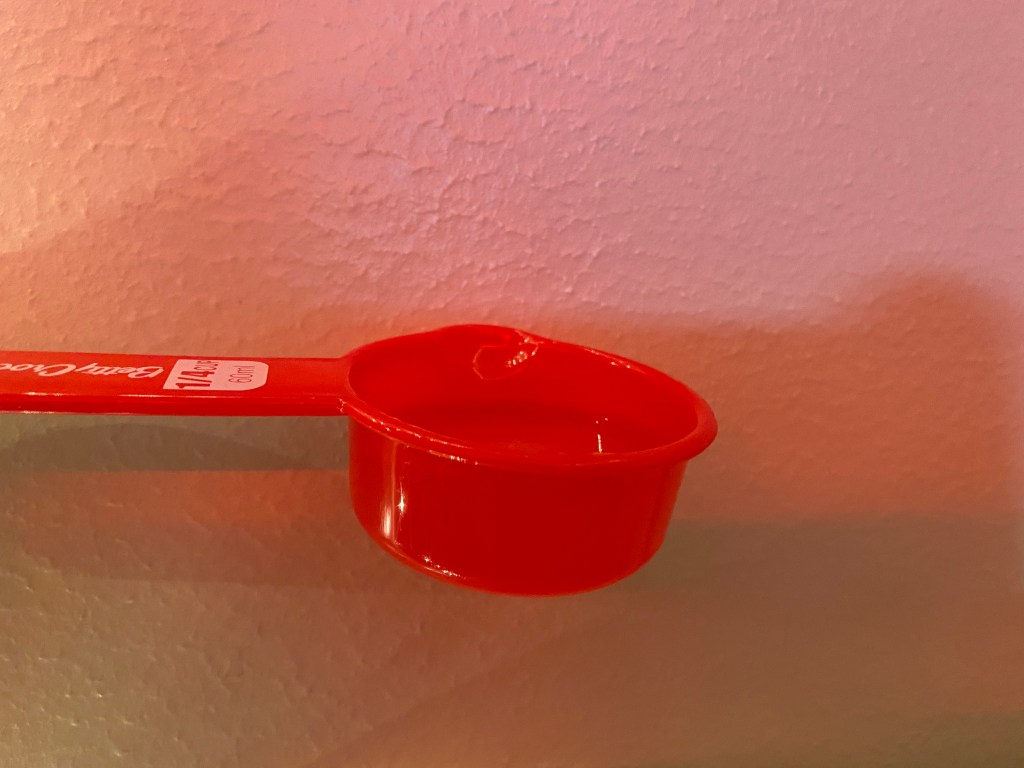
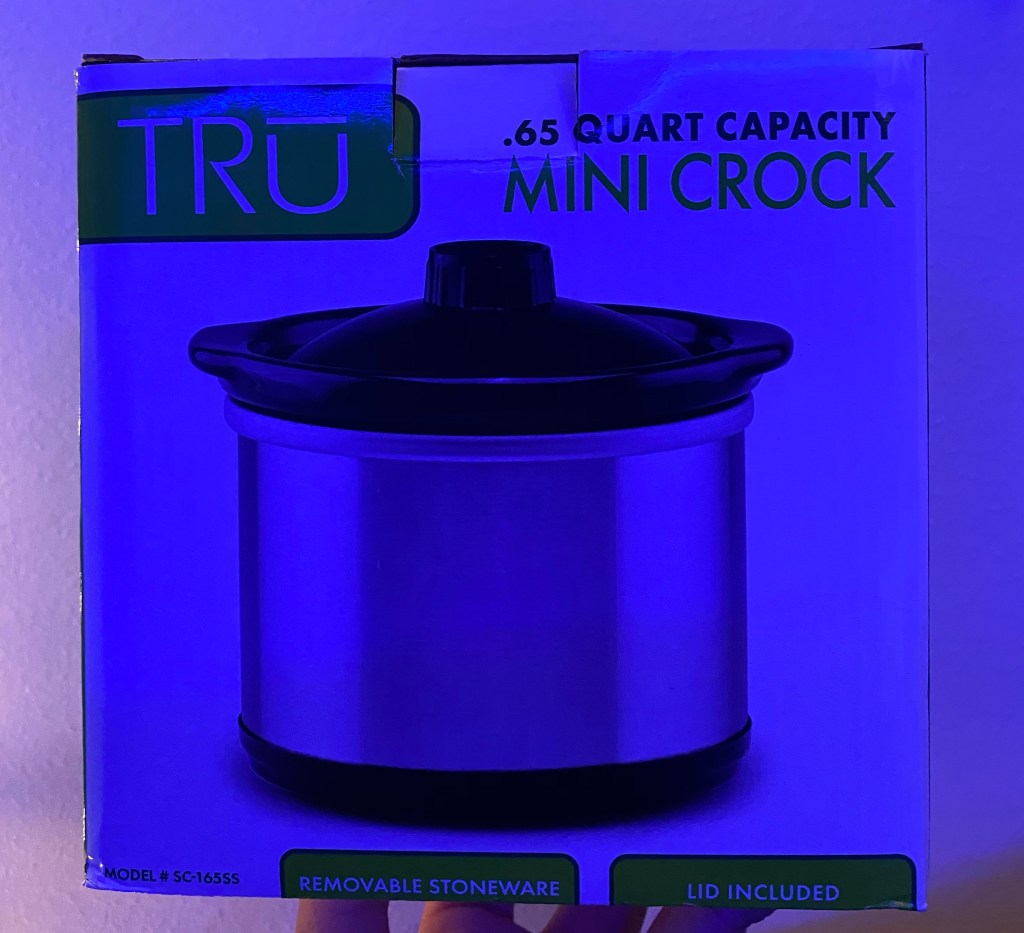
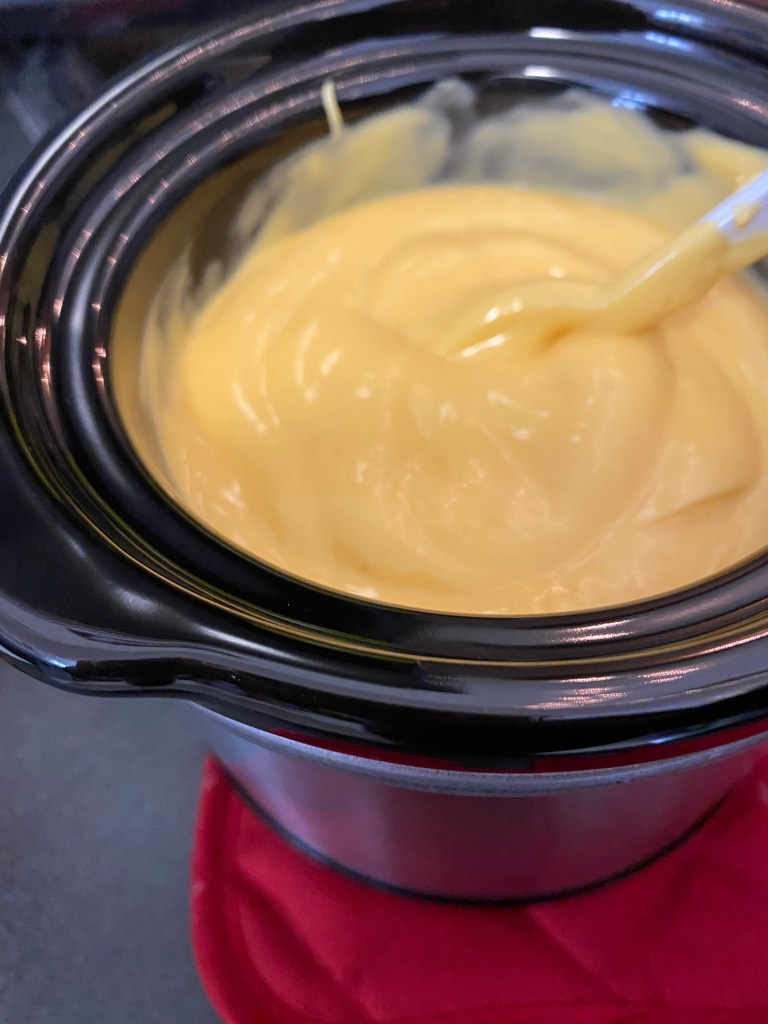
First, you are going to let your crockpot heat up on high heat and pour the cheese inside. To get a creamy consistency, pour the water into the pot with the cheese. Stir the cheese and cover the crockpot with a lid to settle for a minute. You want to keep an eye on the cheese, so continuously stir until cheese is ready. I love my cheese to be very hot, so I look for steam coming out of the crockpot to determine when it is ready. For the next process, there are two ways you can approach it.
A perfect consistency of the cheese.
One of them is grabbing a bowl and pouring the Takis into the bowl, or you can open up a bag of Takis and eat them from there. You drizzle the cheese all inside the bag of Takis. I personally love a lot of cheese,but pour as much as you like. Finally, grab a spoon and napkin and enjoy. The taste of the cheese and hint of Limon mixture is the perfect flavor for your taste buds.
EXTRA INFO:
If you do not like Takis, don’t worry! There are other chips you can put cheese on such as Hot Cheetos, Hot Funyons, Fritos, Tostitos, and so much more.
Hello world! Welcome to my blog where I will be posting about different Hispanic foods and snacks, but first let me introduce myself. I am a Freshman attending Texas State University studying Mass Communications in Electronic Media with a Minor in Theatre. My hobbies include dancing, hanging out with family and friends, listening to music, and cooking. I am a proud Latina woman who was born and raised in Mission, Texas. It is a city in South Texas also knows as The Valley. The best thing about growing up in South Texas is the culture it embraces, and the amazing food it has to offer.
I am a huge food lover especially when it comes to Mexican food. In my hometown, there are more Mexican restaurants than fast-food chains. When I was getting ready to leave for college the biggest thing I was going to miss was the food. I was not the greatest cook, but I wanted to learn and perfect my cooking skills. My mother and father are the greatest cooks when it came to making food, so as I got closer to leave I started following her steps on how to cook traditional Mexican dishes. Besides my love for Mexican food, I have a bigger love for Hispanic snacks mainly if they are spicy.
The two greatest cooks who taught me what I know, my mother and father.
In this blog, I will be giving a glimpse on some of the delicious dishes and snacks the Hispanic culture has to offer. When it comes to snacks, I always add a twist to them. I will be teaching my audience on how to make the unexpected on a simple snack. I want to be able to make my favorite foods enjoyable to those who have never tried them. My goals are to expand the knowledge of Mexican food and teach others how to make foods I enjoyed growing up. I hope to maybe introduce someone to their new favorite food just by following a simple recipe.